
Install Ubuntu 24.04 With Proper Btrfs Setup
Table of Contents
One of the best filesystems for Linux is btrfs. It is a modern copy-on-write (CoW) filesystem for Linux aimed at implementing advanced features while focusing on fault tolerance, repair, and easy administration. Btrfs is the default filesystem for Fedora, openSUSE, and SUSE Linux Enterprise. Ubuntu has also been using Btrfs as the default filesystem for the desktop version since 21.10. In this guide, we will install Ubuntu 24.04 with a proper Btrfs setup.
Because of the fact of that btrfs is a CoW filesystem it does require a bit more RAM than ext4. However, if system has 8GB or more RAM, it should be fine. If you have less than 8GB of RAM and a SSD that is 1TB or larger you want to consider using ext4 instead of btrfs. This is because btrfs will use about 1GB of RAM for every 1TB of storage.
Getting Ubuntu 24.04
There are few official flavors of Ubuntu 24.04 available. You can download the one you prefer from the Ubuntu website or the default Ubuntu 24.04 from the Ubuntu website .
The best applications to use on Windows, MacOS, and Linux to create a bootable USB stick is Balena Etcher . What is good about Balena Etcher is that it only show the USB sticks that are available to write to. Keeping you from accidentally writing to the wrong device and overwriting your drive.
If you like to live on the edge you can use the dd command to create a bootable USB stick.
sudo dd if=/path/to/ubuntu-24.04.iso of=/dev/sdX bs=4M status=progress oflag=sync
Replace /path/to/ubuntu-24.04.iso with the path to the downloaded ubuntu-24.04.iso file and /dev/sdX with the device name of the USB stick. Make sure to use the correct device name for the USB stick as this command will overwrite the entire device. Just be careful, because you can easily overwrite your hard drive if you use the wrong device name.
Booting the Live Environment
After creating the bootable USB stick, plug it into the computer and boot from it. You may need to change the boot order in the BIOS settings to boot from the USB stick. Once the computer has booted into the live environment, you can start the installation process by clicking on the Install Ubuntu icon on the desktop.
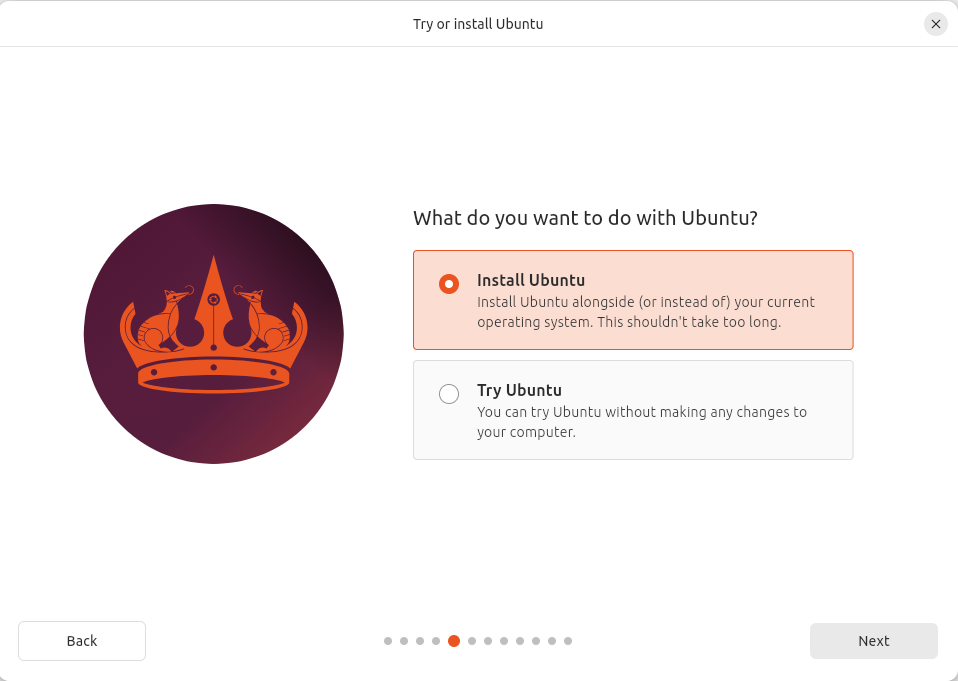
The default option for the grub bootloader is ‘Try or Install Ubuntu’. You can select this option to try out Ubuntu 24.04 before installing it. If you are ready to install Ubuntu 24.04, click on the Install Ubuntu icon on the desktop.
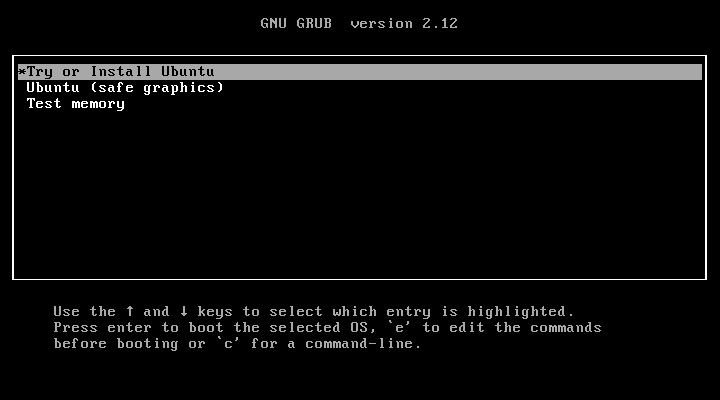
If you leave the grub boot loader alone it will boot into the live environment after 10 seconds. If you want to boot into the live environment immediately, you can press the Enter key.
Basic Installation
The installation process is pretty straightforward. You will be asked to select your language, keyboard layout, and timezone. You will also be asked to create a user account and set a password. You can choose to encrypt your home folder or not. You will also be asked to select the installation type. You can choose to install Ubuntu 24.04 alongside Windows, erase the disk and install Ubuntu 24.04, or do something else.
Language, Accessibility, and Keyboard Layout
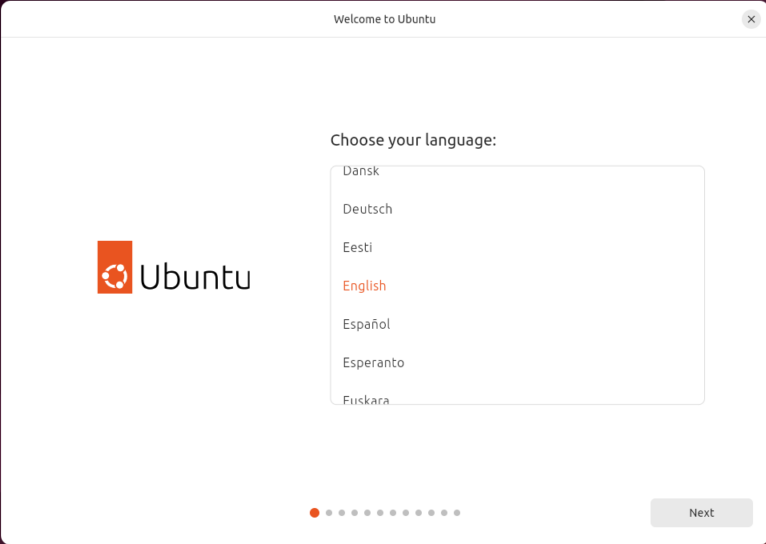
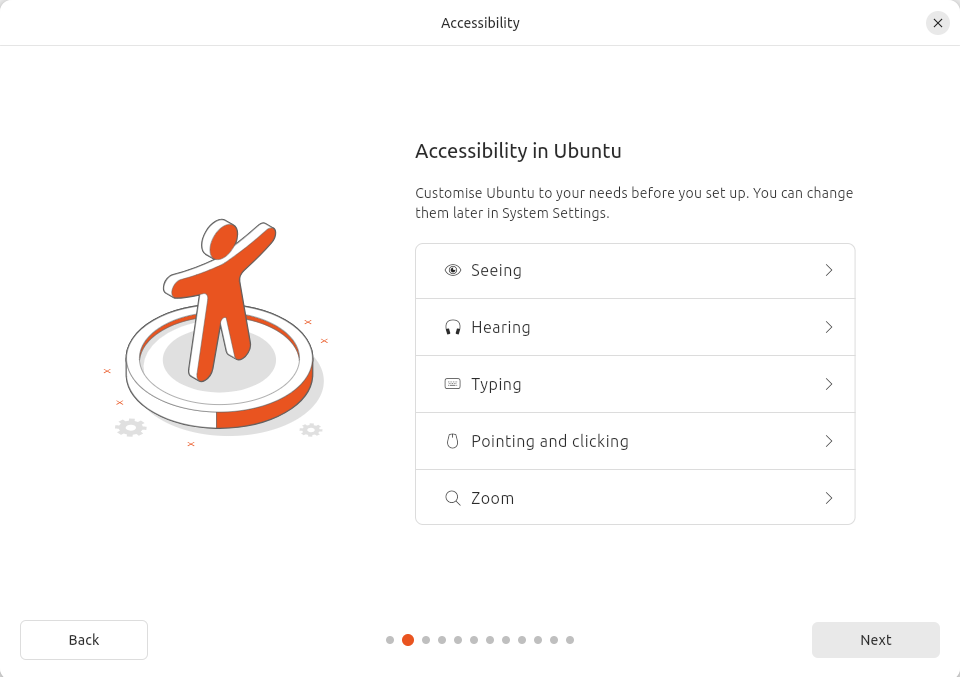
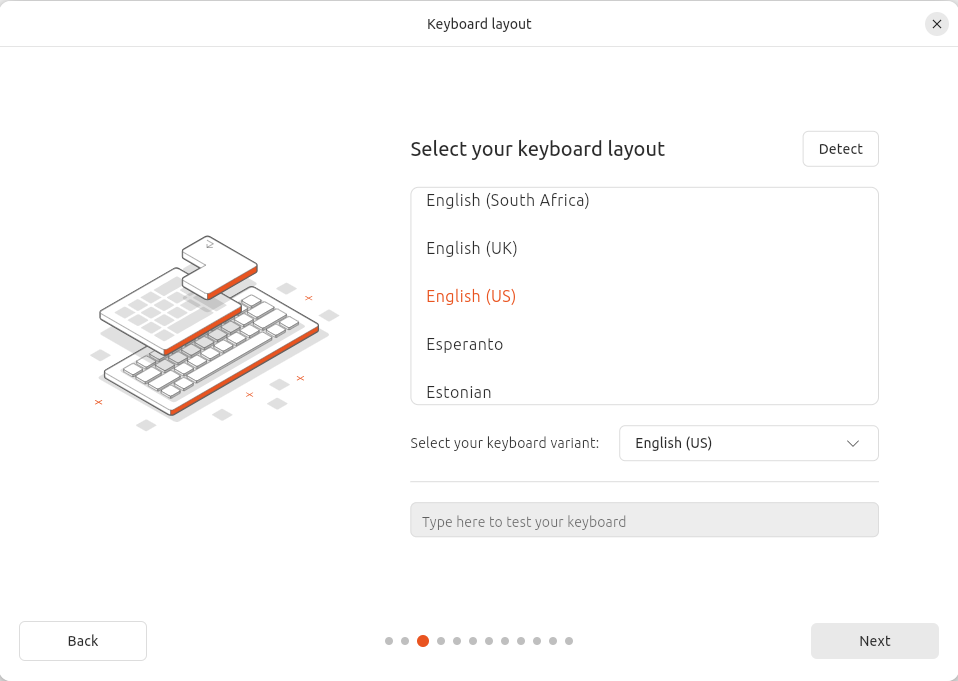
If the default option works for you then you can click on the Next button to continue. If you need to change the language, accessibility options, or keyboard layout, you can do so by clicking on the appropriate button.
The default option is English, that is because Cononical is based in the UK and Ubuntu was first developed in South Africa. You can change the language to your preferred language. Click on the ‘Next’ button to continue.
The installer allows you to enable or change the accessibility options prior to installation. You can enable the screen reader, magnifier, or on-screen keyboard. Click on the ‘Next’ button to continue.
The keyboard layout should be set to what the installer detected. If it is not correct change it to the correct layout.
Network Connection
If you are connected to the internet by way of an Ethernet cable, the installer will automatically connect to the internet. if no connection is detected you can connect to a wireless network if a wireless card is detected. Click on the ‘Next’ button to continue.
You can also choose to not connect to the internet. This is useful if you are installing Ubuntu 24.04 on a computer that is not connected to the internet.

Depending on if you are connected or not will determine if you can install updates and third-party software during the installation process. The default is to ‘Install Ubuntu.’ Which is what we want to do.
Install or Try, Installation Type and Third-Party Software
I recommend that you do connect to a network that has internet access. This will allow you to install updates and third-party software during the installation process.
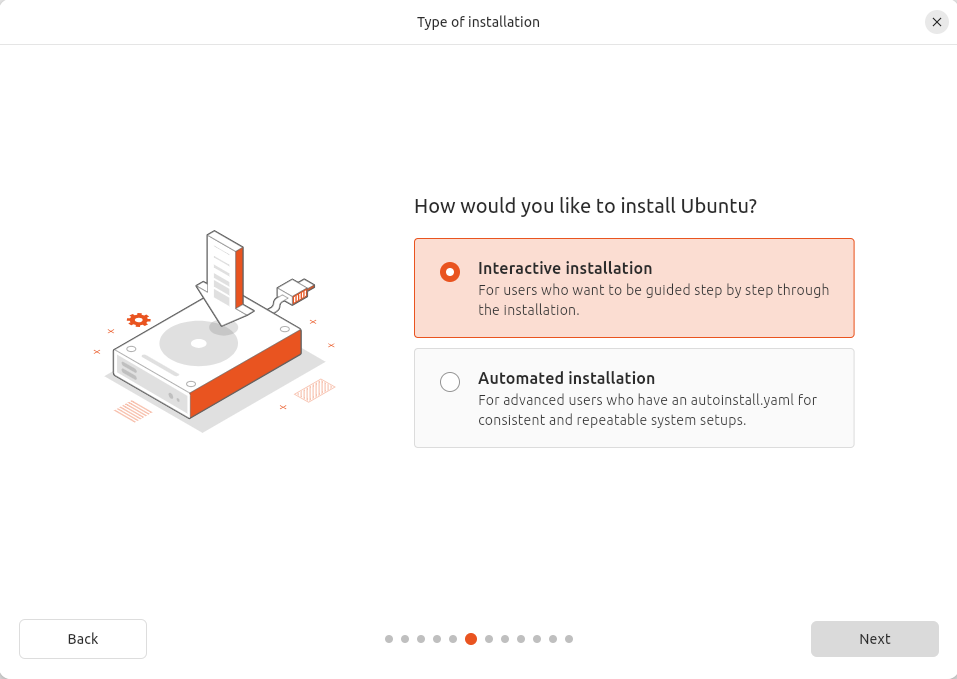
Interactive installation is the default option. This is the option we want to choose. This will allow us to choose the installation type and other options. Automated installation is for unattended installations and is useful for system administrators deploying multiple systems
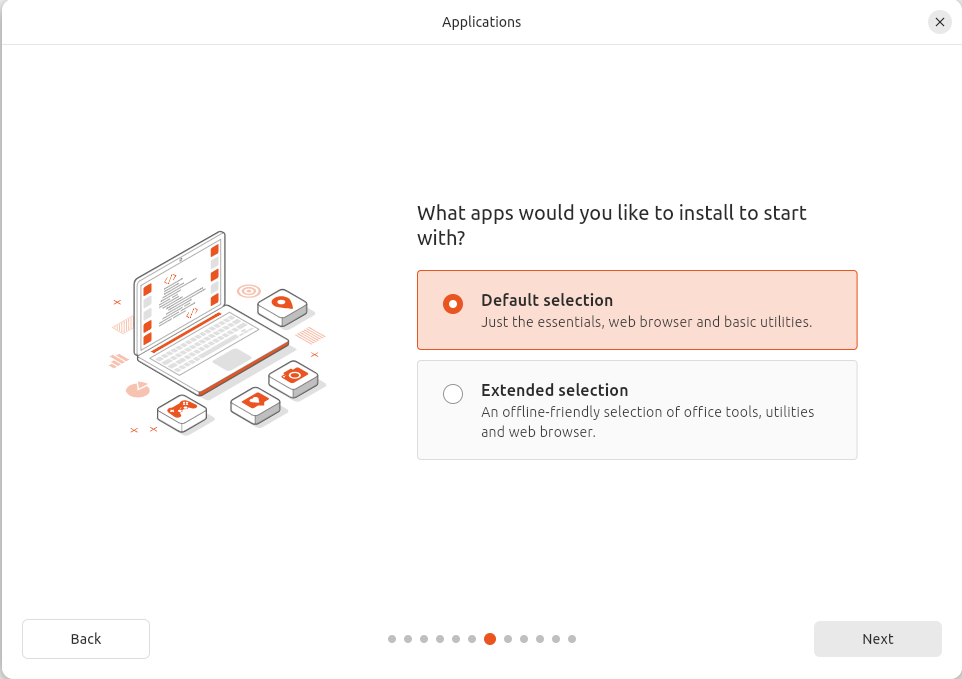
Level the default selected, this is the normal applications that come with Ubuntu.
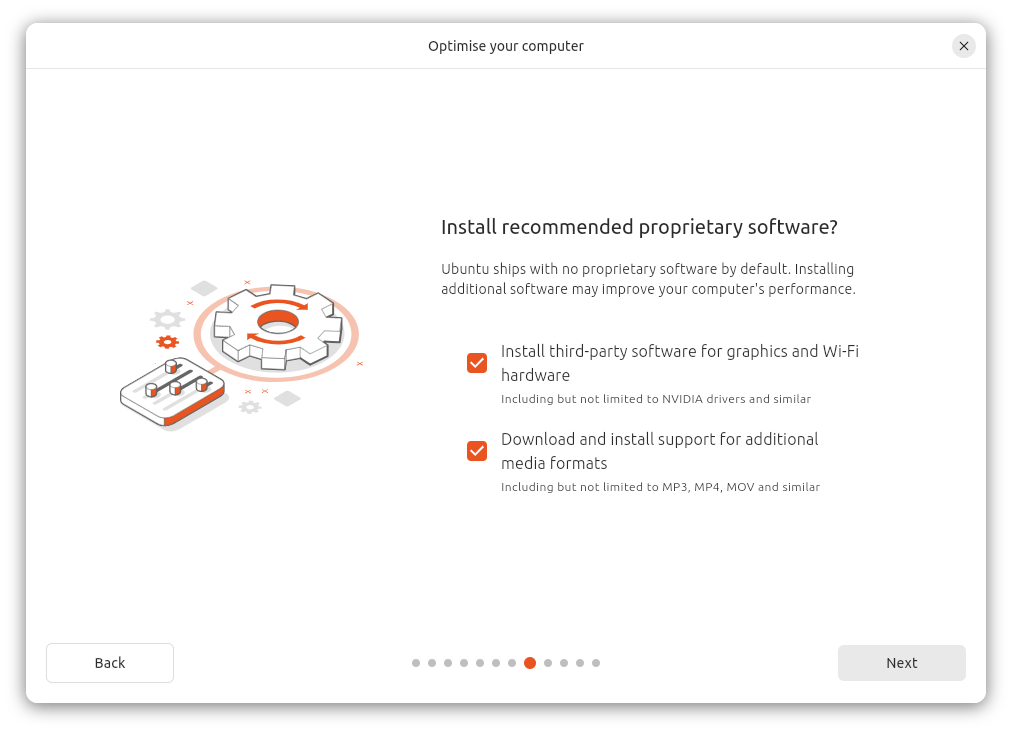
The default option is to ‘Install third-party software for graphics and Wi-Fi hardware, Flash, MP3, and other media.’ This is the option we want to choose. This will install the necessary drivers and codecs to play media files.
We want to select both ‘Third-party software’ and ‘Media formats.’ This will install the necessary drivers and codecs to play media files.
Drive Setup
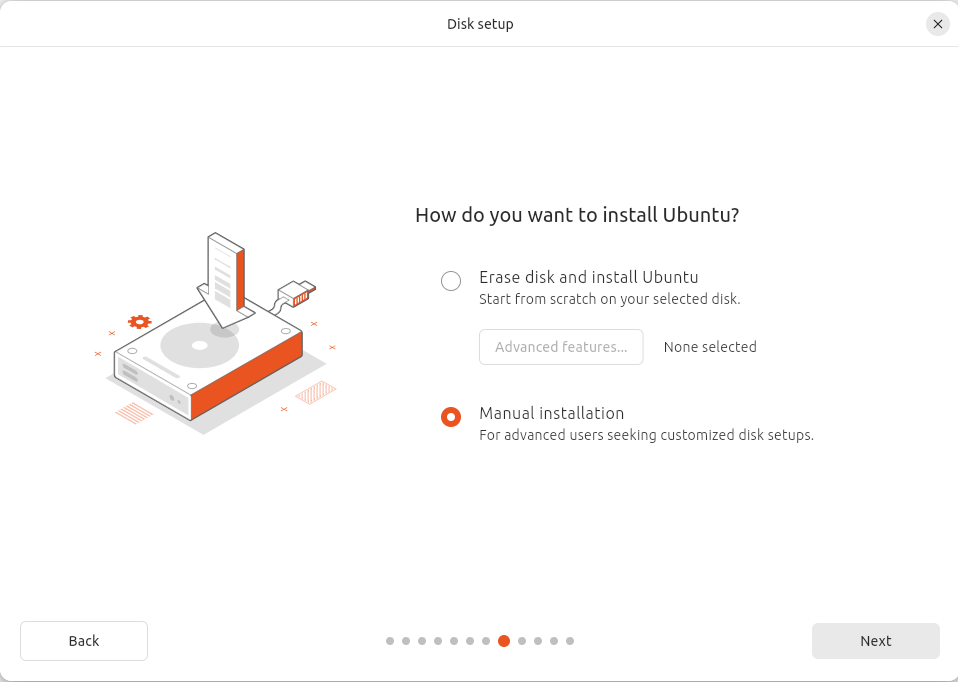
The default option is to ‘Erase disk and install Ubuntu’ not what we want to do: instead what we want is ‘Manual installation.’ This will allow us to set up the drive the way we want it. In this case, we want to set up the drive with btrfs as the filesystem with the following subvolumes:
With btrfs we can create subvolumes that will allow us to take snapshots of the system. This is useful if we need to roll back the system to a previous state. We can also create subvolumes for the home, tmp, var/cache and var/log directories. This will allow us to keep the system clean and organized.
| Subvolume | Mount Point | Description |
|---|---|---|
| @ | / | Main root subvolume |
| @home | /home | Home directory with user data |
| @cache | /var/cache | Cache |
| @log | /var/log | Log |
| @tmp | /var/tmp | Temp |
| @snapshots | /.snapshots | Snapshots |
On the bottom left just above the ‘Back’ button select the device for the EFI System Partition for the boot loader installation. This should be the same device as the root partition. In this case, it is sda. As I’m using a virtual machine. If you are using a physical machine it maybe nvme0n1 if the system has a NVMe drive.
Either way I assume that you are installing on an SSD be it a SATA or NVMe drive.
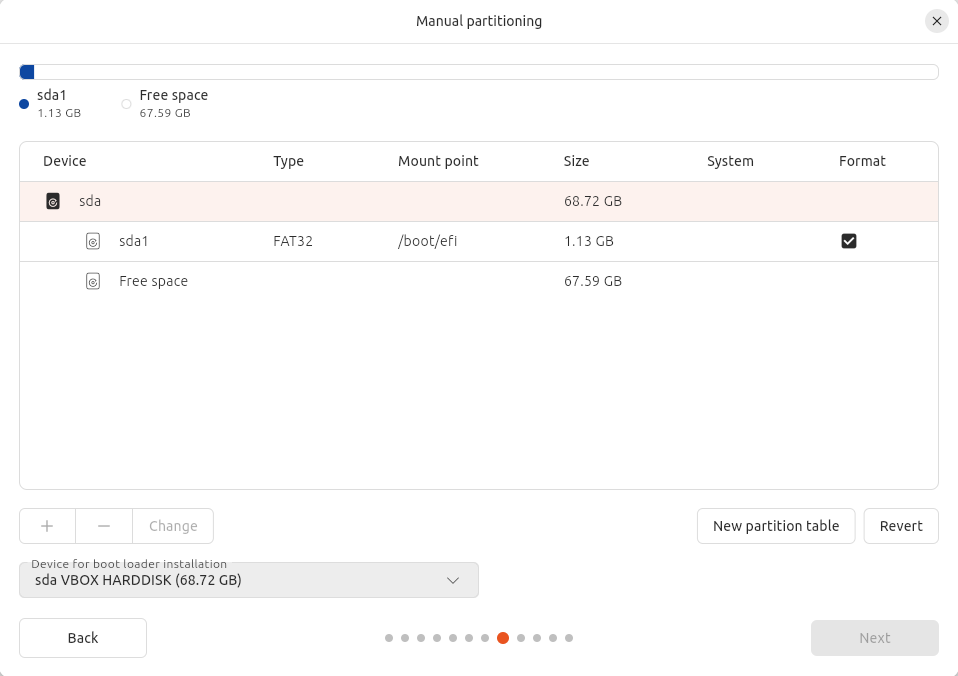
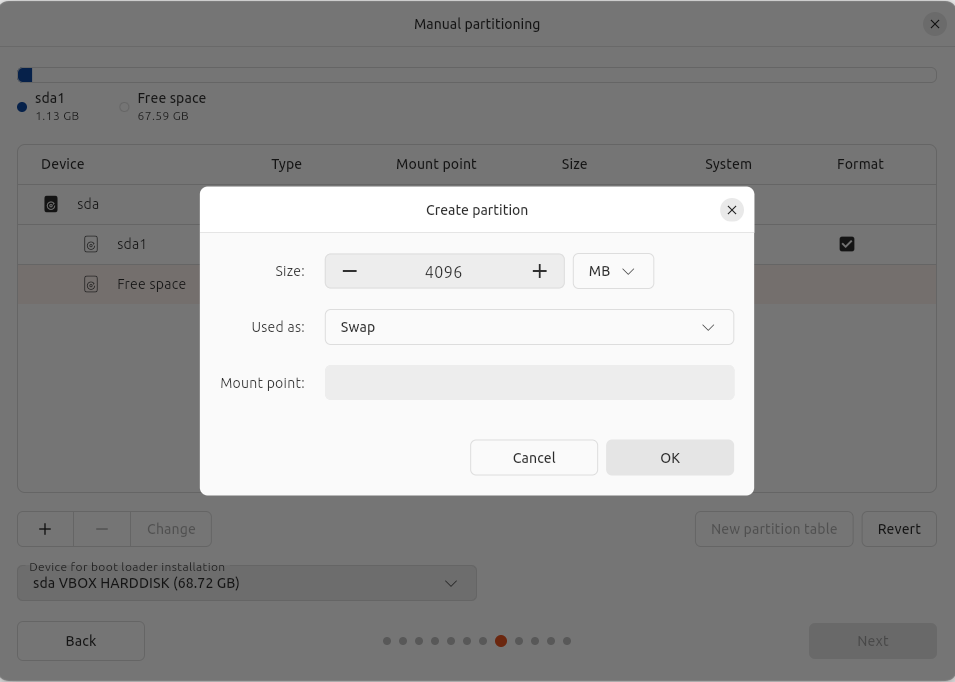
Since we are using btrfs as the filesystem a swapfile will not work, because btrfs snapshot do not play will with swapfiles. Instead, we will create a swap partition. The swap partition should be about 8GB or less, anything more just a waste of space. Not having a swap partition is not an option as the system will not hibernate without it, plus some applications require a swap partition.
In this case I’m setting up a 4GB swap partition. This is more than enough for my needs. If you are not doing any heavy video editing or running a database server you can get away with a 2GB swap partition mounted as a ZRAM device.
NOTE: ZRAM users part of the RAM as a compressed block device. This, however disable hibernation.
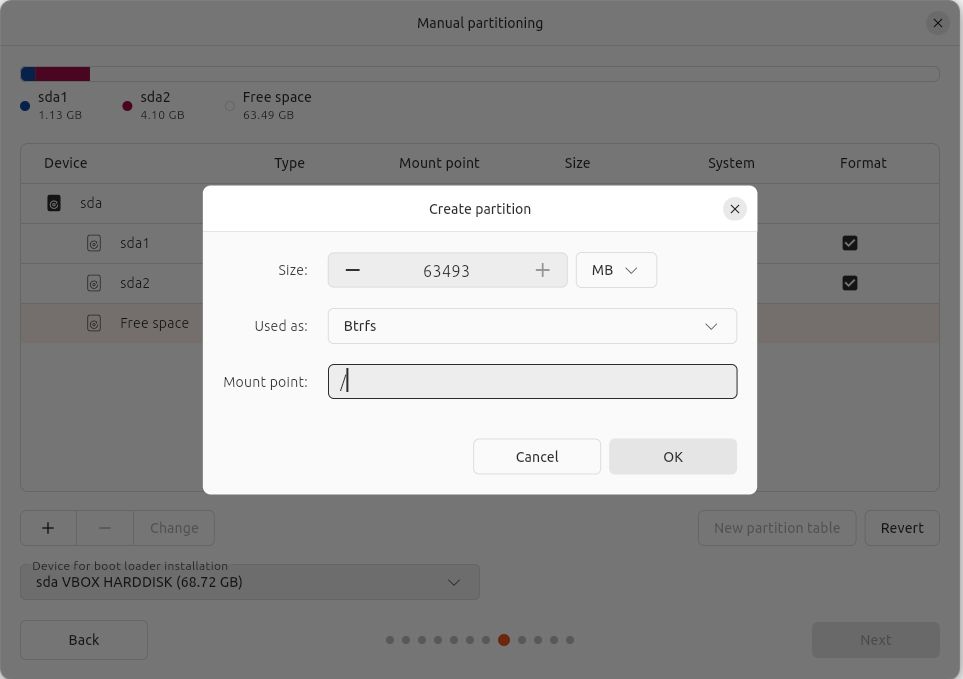
The root partition should be about 50GB or more. This will allow for the installation of applications and updates. The root partition should be mounted as /.
Normally you would create a separate home partition, but with btrfs this is not necessary so instead we will use the remaining space on the drive for the root partition.
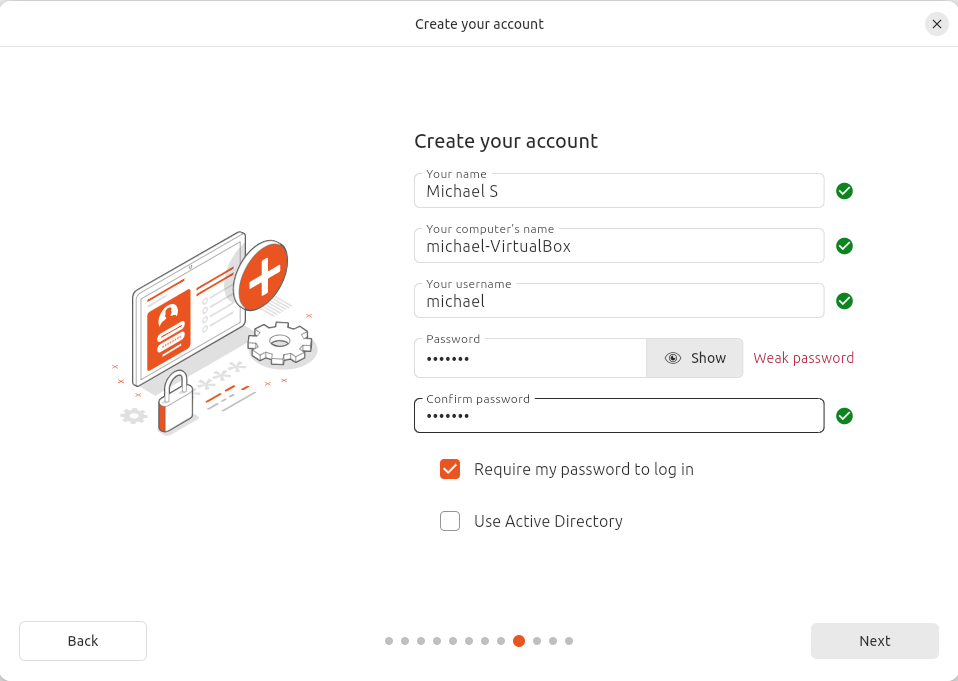
User Account and Location
The default option is to ‘Require my password to log in.’ This is the option we want to choose. This will require a password to log in to the system.
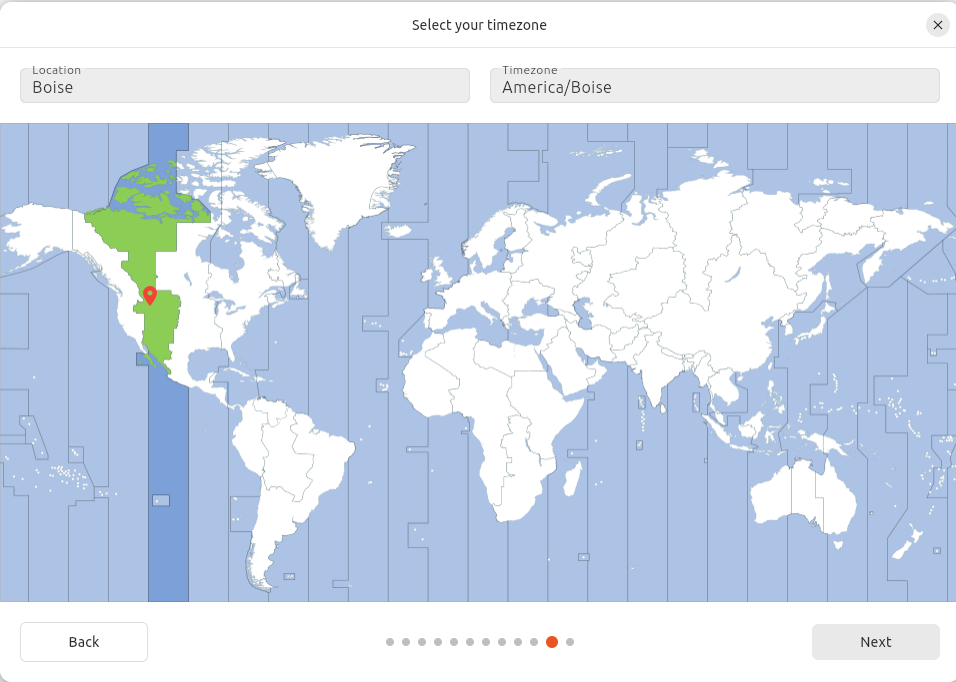
The default option is to ‘Set up this computer as a local server.’ This is the option we want to choose. This will set up the computer as a local server. Once you set the location and click on the ‘Next’ you see the time change to the correct time zone.
Installation
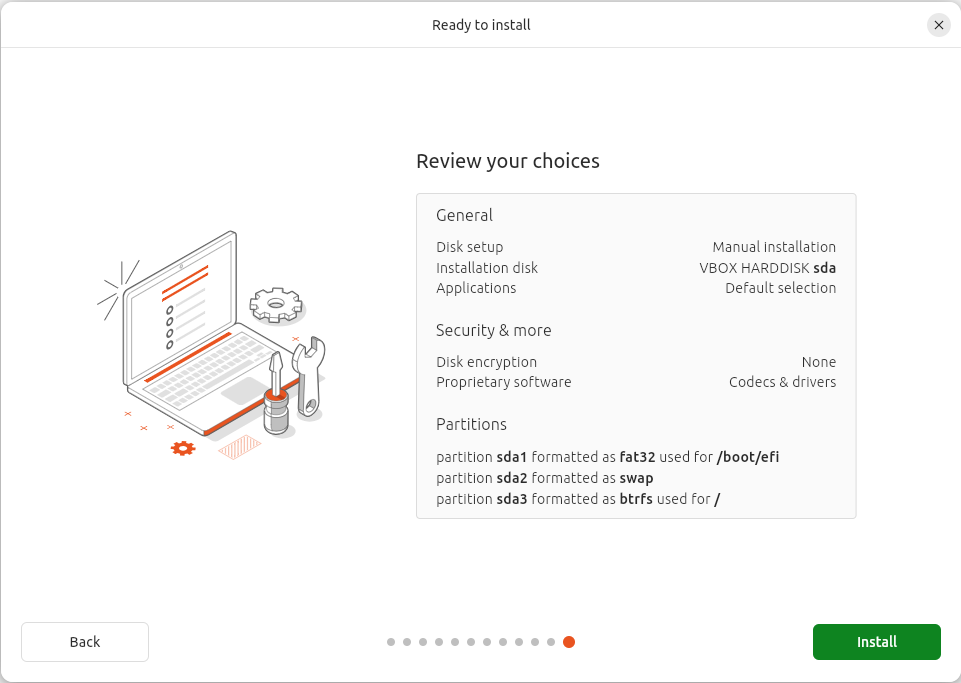
The last step is to review the installation settings and click on the Install button to start the installation process. The installation process will take some time to complete. Once the installation is complete, you will be prompted to restart the computer. Click on the Restart Now button to restart the computer.
The installer summary will show the installation settings. If everything looks good click on the ‘Install’ button to start the installation process.
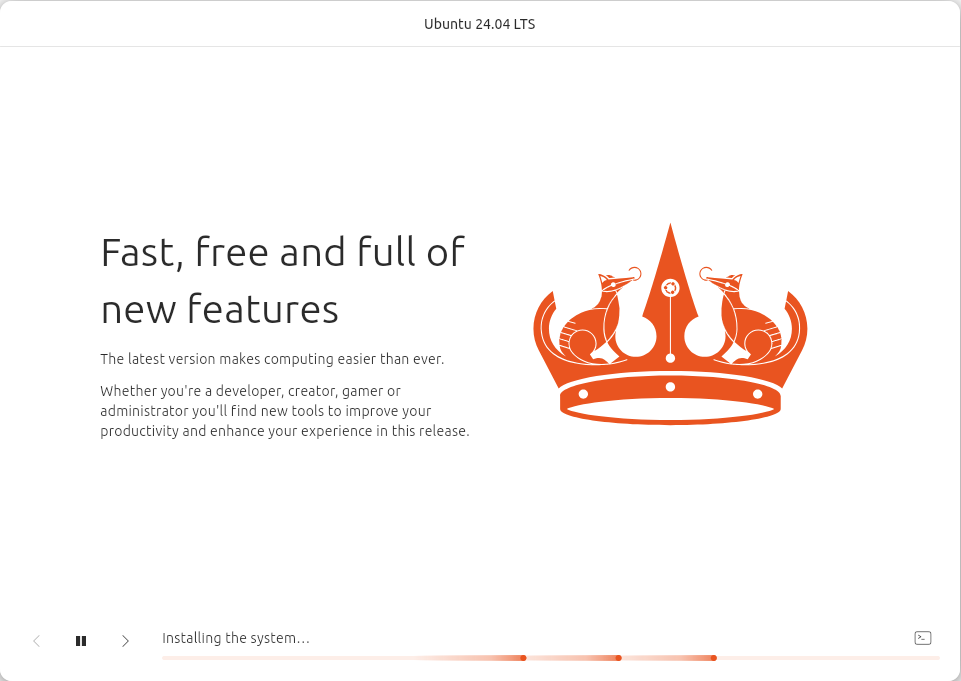
The installation process will take some time to complete. Once the installation is complete.
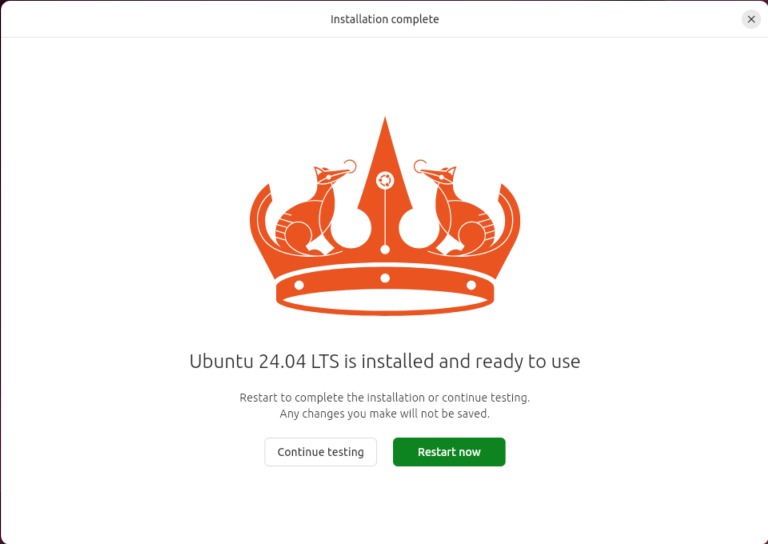
You will be prompted to restart the computer since this is the default option. However, we need to make some changes to the system before we can restart the computer, so click on the Continue Testing’ button.
BTRFS Setup
A brief summary of home btrfs subvolumes work. When you create a subvolume it is like creating a new directory. You can create a snapshot of the subvolume and it will be like creating a copy of the directory. You can also create a snapshot of the entire filesystem and it will be like creating a copy of the entire filesystem. This is useful if you need to roll back the system to a previous state.
Umount everything with sudo umount -a. Then mount the root partition with sudo mount /dev/<sdaX|nvme0n1pX> /mnt and copy resolv.conf file sudo cp -vf /etc/resolv.conf /mnt/etc/resolv.conf. Then create the first subvolumes with the following command: sudo btrfs su snapshot /mnt/@. This will create a snapshot of the root partition thereby creating a root level subvolume.
Remove the main installed contents.
sudo rm -rv /mnt/{bin,bin*,boot,cdrom,etc,home,lib,lib*,media,mnt,opt,root,run,sbin,sbin*,snap,srv,sys,tmp,usr,var}
Now we can create the rest of the subvolumes with the following commands.
sudo btrfs su create /mnt/@{home,cache,log,tmp,snapshots}
Copy the contents of the /mnt/@/var/cache to /mnt/@cache and /mnt/@/var/log to /mnt/@log as an archive to preserve the permissions and ownership.
sudo cp -av /mnt/@/var/cache/* /mnt/@cache && rm -rv /mnt/@/var/cache/* || echo "No cache directory"
sudo cp -av /mnt/@/var/log/* /mnt/@log && rm -rv /mnt/@/var/log/* || echo "No log directory"
Unmount the root partition with sudo umount /mnt.
Remount and Chroot
Once the subvolumes are created and the contents of the var/cache and var/log directories are copied to the cache and log subvolumes, you can remount the root partition and chroot into the system. Remember to mount according to the drive type and replace ‘X’ with the correct partition number.
Mount the subvolumes as follows:
sudo mount -o subvol=@ /dev/<sdaX|nvme0n1pX> /mnt
sudo mount -o subvol=@home /dev/<sdaX|nvme0n1pX> /mnt/home
sudo mount -o subvol=@cache /dev/<sdaX|nvme0n1pX> /mnt/var/cache
sudo mount -o subvol=@log /dev/<sdaX|nvme0n1pX> /mnt/var/log
sudo mount -o subvol=@tmp /dev/<sdaX|nvme0n1pX> /mnt/var/tmp
sudo mount -o subvol=@snapshots /dev/<sdaX|nvme0n1pX> /mnt/.snapshots
Lastly mount the EFI boot partition sudo mount /dev/<sdaY|nvme0n1pY> /mnt/boot/efi because we are going to need to rebuild the grub configuration file and update the fstab file.
for d in dev proc sys run; do sudo mount --rbind /$d /mnt/$d; done
Chroot into the environment: sudo chroot /mnt /bin/bash.
Grub Boot Loader and fstab
Because we are using subvolumes with btrfs we need to regenerate the grub configuration file and update the fstab file. First, regenerate the grub configuration file.
sudo grub-mkconfig -o /boot/efi/EFI/ubuntu/grub.cfg
sudo update-grub
Next, update the fstab file. Create a script to generate the fstab file nano gen-fstab and paste the following code.
#!/bin/bash

function subvol () {
	for su in $(btrfs su list / | grep 'level 5' | awk '{print $9}'); do

	    if test "$su" = "@" ; then mountAt="/" ; fi
	    if test "$su" = "@home" ; then mountAt="/home" ; fi
	    if test "$su" = "@log" ; then mountAt="/var/log" ; fi
	    if test "$su" = "@tmp" ; then mountAt="/tmp" ; fi
	    if test "$su" = "@cache" ; then mountAt="/var/cache" ; fi
	    if test "$su" = "@snapshots" ; then mountAt="/.snapshots" ; fi

	    echo "${getRootFS} $mountAt btrfs ${btrfsOptions},subvol=${su} 0 0"
	done
}

btrfsOptions="ssd,noatime,space_cache=v2,compress=lzo"

getBootFS="$(cat /etc/fstab | grep "vfat" | awk '{print $1}')"
getBootFS="$(cat /etc/fstab | grep "btrfs" | awk '{print $1}')"
getSwapFS="$(cat /etc/fstab | grep "swap" | awk '{print $1}')"

cat <<EOF > /etc/fstab
# /etc/fstab: static file system information.
#
# <file system> <mount point>   <type>  <options>       <dump>  <pass>

# EFI boot partition
${getBootFS} /boot/efi vfat defaults 0 1

# Mount btrfs subvolumes
$(subvol)

# Swap
${getSwapFS} none swap defaults 0 0
EOF

exit 0
Make the script executable and make a backup of the fstab file;
cp -v /etc/fstab /etc/fstab.bak
chmod +x /usr/local/bin/gen-fstab ; gen-fstab
Open the fstab file and make sure that the fstab file is correct. If everything looks good, you can exit the chroot environment with exit and reboot the system. Press the Enter and remove the USB stick when prompted. Otherwise, make the necessary changes and reboot the system.
Post Installation
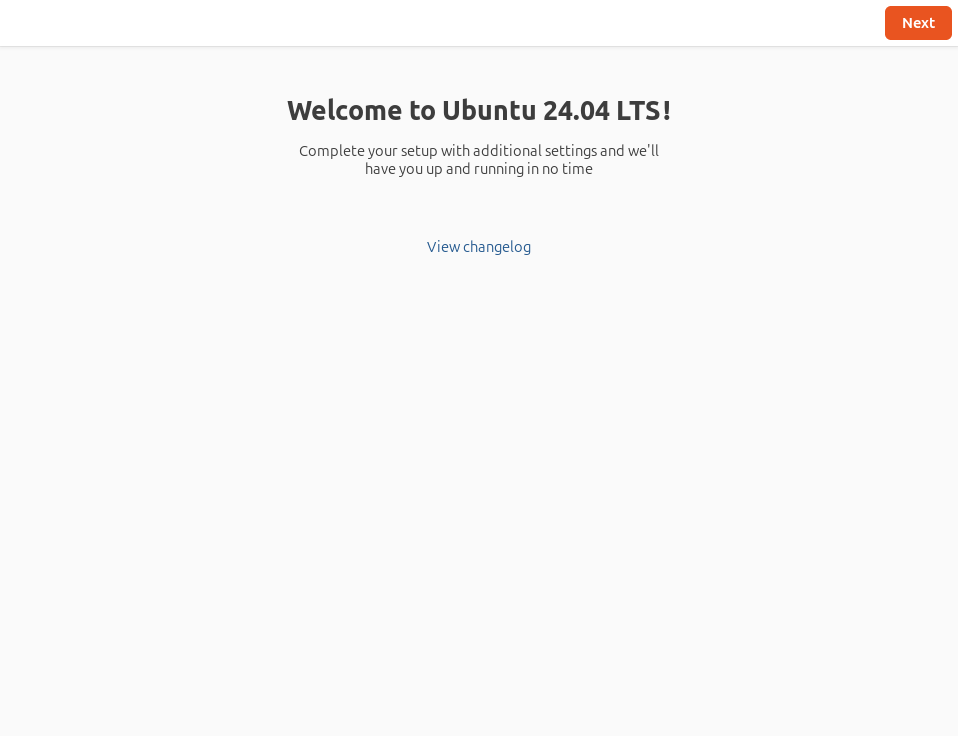
Once the system has rebooted you logged into your account. The first thing we see is the Welcome screen. Press the ‘Next’ button to continue.
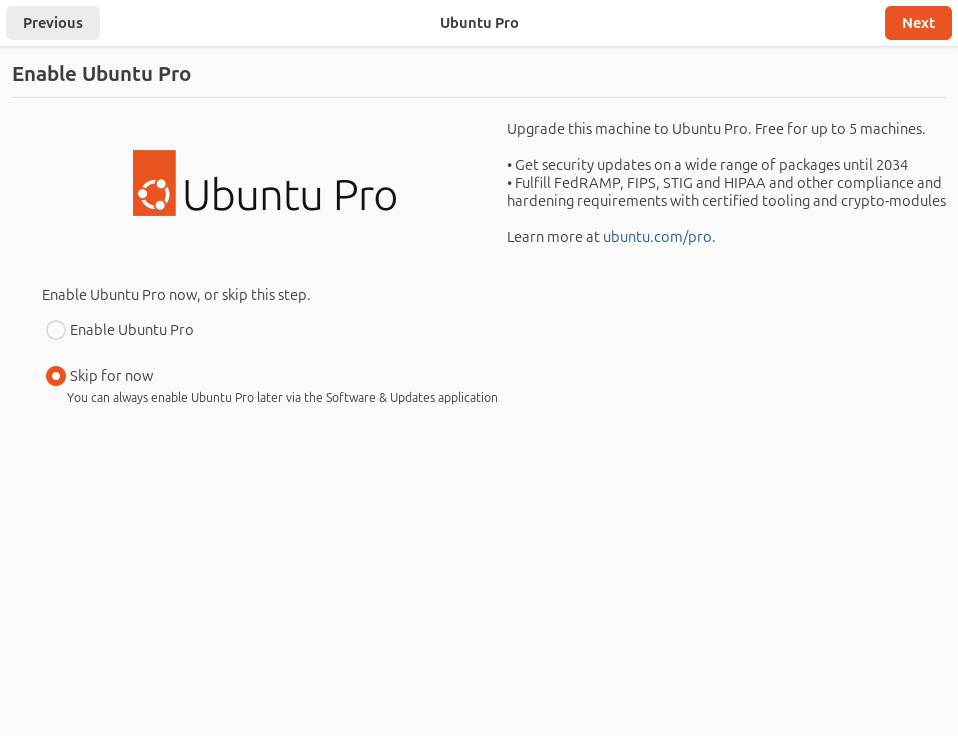
The Welcome screen will show you the latest news and updates. You can click on the Next button to continue. Select the ‘Skip for now’ button to skip the Ubuntu Pro subscription.
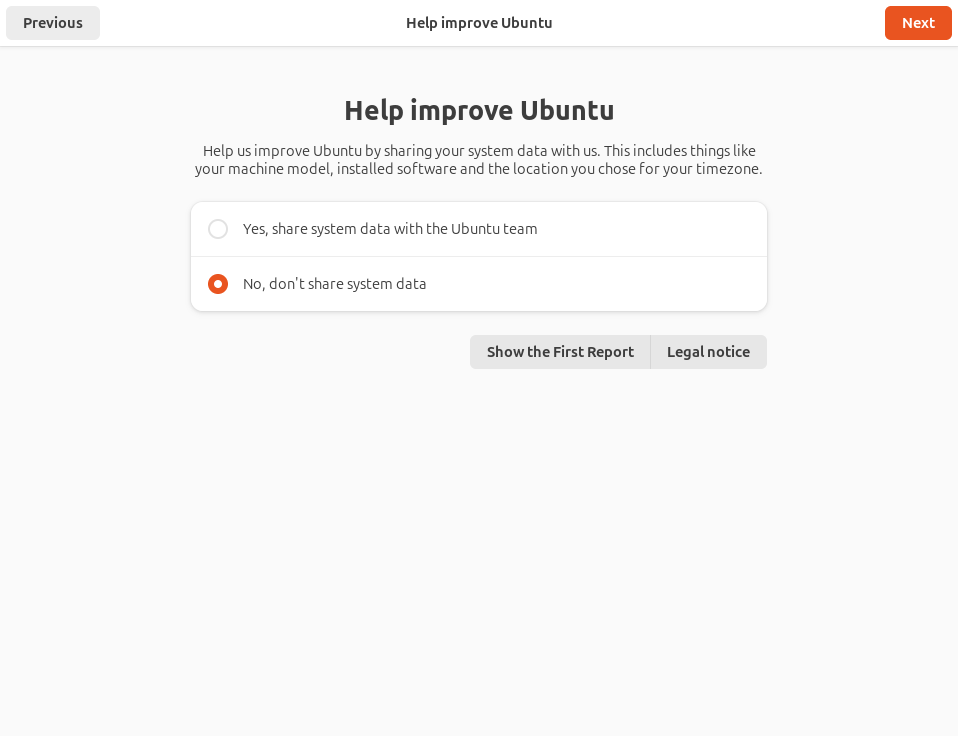
The default option is to ‘Yes, to send system information.’ This will allow Canonical to collect system information. If you do not want to send system information, you can select ‘No, don’t share system data.’
This depends on what you want to do, for me I’m going to select ‘No, don’t share system data.’ Even though the telemetry data is more anonymous than what Microsoft collects. I just don’t like the idea of the default option being to send system information.
The last step is to click on the ‘Finish’ button to close the Welcome screen.
Conclusion
This installation guide goes behond the basic installation of Ubuntu 24.04 with btrfs as the filesystem. We created subvolumes for the home, tmp, var/cache and var/log directories. This will allow us to keep the system clean and organized. We also created a swap partition and updated the grub configuration file and fstab file. This will allow us to take snapshots of the system and roll back the system to a previous state if needed.
I hope this guide helps you with the installation of Ubuntu 24.04 with a proper btrfs setup. If you have any questions or comments, please leave them in the comment section below.